Design Patterns in Java Tutorial

Design patterns represent the best practices used by experienced object-oriented software developers. Design patterns are solutions to general problems that software developers faced during software development. These solutions were obtained by trial and error by numerous software developers over quite a substantial period of time.

This tutorial will take you through step by step approach and examples using Java while learning Design Pattern concepts.

Audience

This reference has been prepared for the experienced developers to provide best solutions to certain problems faced during software development and for un-experienced developers to learn software design in an easy and faster way.

Prerequisites

Before you start proceeding with this tutorial, I’m making an assumption that you are already aware about basic java programming concepts. If you are not well aware of these concepts then I will suggest to go through our short tutorial on Java Programming

Design Patterns – Decorator Pattern

Decorator pattern allows a user to add new functionality to an existing object without altering its structure. This type of design pattern comes under structural pattern as this pattern acts as a wrapper to existing class.

This pattern creates a decorator class which wraps the original class and provides additional functionality keeping class methods signature intact.

We are demonstrating the use of decorator pattern via following example in which we will decorate a shape with some color without alter shape class.

Implementation

We’re going to create a Shape interface and concrete classes implementing the Shapeinterface. We will then create an abstract decorator class ShapeDecorator implementing theShape interface and having Shape object as its instance variable.

RedShapeDecorator is concrete class implementing ShapeDecorator.

DecoratorPatternDemo, our demo class will use RedShapeDecorator to decorate Shapeobjects.

decorator_pattern_uml_diagram

Step 1

Create an interface.

Shape.java

public interface Shape {
   void draw();
}

Step 2

Create concrete classes implementing the same interface.

Rectangle.java

public class Rectangle implements Shape {

   @Override
   public void draw() {
      System.out.println("Shape: Rectangle");
   }
}

Circle.java

public class Circle implements Shape {

   @Override
   public void draw() {
      System.out.println("Shape: Circle");
   }
}

Step 3

Create abstract decorator class implementing the Shape interface.

ShapeDecorator.java

public abstract class ShapeDecorator implements Shape {
   protected Shape decoratedShape;

   public ShapeDecorator(Shape decoratedShape){
      this.decoratedShape = decoratedShape;
   }

   public void draw(){
      decoratedShape.draw();
   }	
}

Step 4

Create concrete decorator class extending the ShapeDecorator class.

RedShapeDecorator.java

public class RedShapeDecorator extends ShapeDecorator {

   public RedShapeDecorator(Shape decoratedShape) {
      super(decoratedShape);		
   }

   @Override
   public void draw() {
      decoratedShape.draw();	       
      setRedBorder(decoratedShape);
   }

   private void setRedBorder(Shape decoratedShape){
      System.out.println("Border Color: Red");
   }
}

Step 5

Use the RedShapeDecorator to decorate Shape objects.

DecoratorPatternDemo.java

public class DecoratorPatternDemo {
   public static void main(String[] args) {

      Shape circle = new Circle();

      Shape redCircle = new RedShapeDecorator(new Circle());

      Shape redRectangle = new RedShapeDecorator(new Rectangle());
      System.out.println("Circle with normal border");
      circle.draw();

      System.out.println("\nCircle of red border");
      redCircle.draw();

      System.out.println("\nRectangle of red border");
      redRectangle.draw();
   }
}

Step 6

Verify the output.

Circle with normal border
Shape: Circle

Circle of red border
Shape: Circle
Border Color: Red

Rectangle of red border
Shape: Rectangle
Border Color: Red

JDBC Example Tutorial – Drivers, Connection, Statement and ResultSet using Property file

Java Database Connectivity (JDBC) API provides industry-standard and database-independent connectivity between the java applications and database servers. Just like java programs that we can “write once and run everywhere”, JDBC provides framework to connect to relational databases from java programs.

JDBC API is used to achieve following tasks:

  • Establishing a connection to relational Database servers like Oracle, MySQL etc. JDBC API doesn’t provide framework to connect to NoSQL databases like MongoDB.
  • Send SQL queries to the Connection to be executed at database server.
  • Process the results returned by the execution of the query.

JDBC Drivers

JDBC API consists of two parts – first part is the JDBC API to be used by the application programmers and second part is the low-level API to connect to database. First part of JDBC API is part of standard java packages in java.sql package. For second part there are four different types of JDBC drivers:

JDBC-Drivers

  1. JDBC-ODBC Bridge plus ODBC Driver (Type 1): This driver uses ODBC driver to connect to database servers. We should have ODBC drivers installed in the machines from where we want to connect to database, that’s why this driver is almost obsolete and should be used only when other options are not available.
  2. Native API partly Java technology-enabled driver (Type 2): This type of driver converts JDBC class to the client API for the RDBMS servers. We should have database client API installed at the machine from which we want to make database connection. Because of extra dependency on database client API drivers, this is also not preferred driver.
  3. Pure Java Driver for Database Middleware (Type 3): This type of driver sends the JDBC calls to a middleware server that can connect to different type of databases. We should have a middleware server installed to work with this kind of driver. This adds to extra network calls and slow performance. Hence this is also not widely used JDBC driver.
  4. Direct-to-Database Pure Java Driver (Type 4): This is the preferred driver because it converts the JDBC calls to the network protocol understood by the database server. This solution doesn’t require any extra APIs at the client side and suitable for database connectivity over the network. However for this solution, we should use database specific drivers, for example OJDBC jars provided by Oracle for Oracle DB and MySQL Connector/J for MySQL databases.

Let’s create a simple JDBC Example Project and see how JDBC API helps us in writing loosely-coupled code for database connectivity.

JDBC-Example-Project

Before starting with the example, we need to do some prep work to have some data in the database servers to query. Installing the database servers is not in the scope of this tutorial, so I will assume that you have database servers installed.

We will write program to connect to database server and run a simple query and process the results. For showing how we can achieve loose-coupling in connecting to databases using JDBC API, I will use Oracle and MySQL database systems.

Run below SQL scripts to create the table and insert some dummy values in the table.

1
2
3
4
5
6
7
8
9
10
11
12
13
14
15
16
17
18
19
20
21
22
23
24
25
26
--mysql create table
create table Users(
  id  int(3) primary key,
  name varchar(20),
  email varchar(20),
  country varchar(20),
  password varchar(20)
  );
  
--oracle create table
create table Users(
  id  number(3) primary key,
  name varchar2(20),
  email varchar2(20),
  country varchar2(20),
  password varchar2(20)
  );
    
--insert rows
INSERT INTO Users (id, name, email, country, password)
VALUES (1, 'Pankaj', 'pankaj@apple.com', 'India', 'pankaj123');
INSERT INTO Users (id, name, email, country, password)
VALUES (4, 'David', 'david@gmail.com', 'USA', 'david123');
INSERT INTO Users (id, name, email, country, password)
VALUES  (5, 'Raman', 'raman@google.com', 'UK', 'raman123');
commit;
Notice that datatypes in Oracle and MySQL databases are different, that’s why I have provided two different SQL DDL queries to create Users table. However both the databases confirms to SQL language, so insert queries are same for both the database tables.

Database Drivers

As you can see in the project image, I have both MySQL (mysql-connector-java-5.0.5.jar) and Oracle (ojdbc6-11.2.0.1.0.jar) type-4 drivers in the lib directory and added to the project build path. Make sure you are using the correct version of the java drivers according to your database server installation version. Usually these jars shipped with the installer, so you can find them in the installation package.

Database Configurations

We will read the database configuration details from the property files, so that we can easily switch from Oracle to MySQL database and vice versa, just by changing the property details.

1
2
3
4
5
6
7
8
9
10
11
#mysql DB properties
#DB_DRIVER_CLASS=com.mysql.jdbc.Driver
#DB_URL=jdbc:mysql://localhost:3306/UserDB
#DB_USERNAME=pankaj
#DB_PASSWORD=pankaj123
#Oracle DB Properties
DB_DRIVER_CLASS=oracle.jdbc.driver.OracleDriver
DB_URL=jdbc:oracle:thin:@localhost:1571:MyDBSID
DB_USERNAME=scott
DB_PASSWORD=tiger

Database configurations are the most important details when using JDBC API. The first thing we should know is the Driver class to use. For Oracle database, driver class is oracle.jdbc.driver.OracleDriver and for MySQL database, driver class is com.mysql.jdbc.Driver. You will find these driver classes in their respective driver jar files and both of these implement java.sql.Driver interface.

The second important part is the database connection URL string. Every database driver has it’s own way to configure the database URL but all of them have host, port and Schema details in the connection URL. For MySQL connection String format is jdbc:mysql://<HOST>:<PORT>/<SCHEMA> and for Oracle database connection string format is jdbc:oracle:thin:@<HOST>:<PORT>:<SID>.

The other important details are database username and password details to be used for connecting to the database.

JDBC Connection Program

Let’s see a simple program to see how we can read above properties and create database connection.

DBConnection.java
1
2
3
4
5
6
7
8
9
10
11
12
13
14
15
16
17
18
19
20
21
22
23
24
25
26
27
28
29
30
31
32
33
package com.journaldev.jdbc;
import java.io.FileInputStream;
import java.io.IOException;
import java.sql.Connection;
import java.sql.DriverManager;
import java.sql.SQLException;
import java.util.Properties;
public class DBConnection {
    public static Connection getConnection() {
        Properties props = new Properties();
        FileInputStream fis = null;
        Connection con = null;
        try {
            fis = new FileInputStream("db.properties");
            props.load(fis);
            // load the Driver Class
            Class.forName(props.getProperty("DB_DRIVER_CLASS"));
            // create the connection now
            con = DriverManager.getConnection(props.getProperty("DB_URL"),
                    props.getProperty("DB_USERNAME"),
                    props.getProperty("DB_PASSWORD"));
        } catch (IOException | ClassNotFoundException | SQLException e) {
            // TODO Auto-generated catch block
            e.printStackTrace();
        }
        return con;
    }
}

The program is really simple, first we are reading database configuration details from the property file and then loading the JDBC driver and using DriverManager to create the connection. Notice that this code use only Java JDBC API classes and there is no way to know that it’s connecting to which type of database. This is also a great example of writing code for interfaces methodology.

The important thing to notice is the Class.forName() method call, this is the Java Reflection method to create the instance of the given class. You might wonder why we are using Reflection and not new operator to create the object and why we are just creating the object and not using it.

The first reason is that using reflection to create instance helps us in writing loosely-coupled code that we can’t achieve if we are using new operator. In that case, we could not switch to different database without making corresponding code changes.

The reason for not using the object is because we are not interested in creating the object. The main motive is to load the class into memory, so that the driver class can register itself to the DriverManager. If you will look into the Driver classes implementation, you will find that they have static block where they are registering themselves to DriverManager.

oracle.jdbc.driver.OracleDriver.java
1
2
3
4
5
6
7
8
9
10
11
12
static
  {
    try
    {
      if (defaultDriver == null)
      {
        defaultDriver = new oracle.jdbc.OracleDriver();
        DriverManager.registerDriver(defaultDriver);
      }
    //some code omitted for clarity
    }
}
com.mysql.jdbc.Driver.java
1
2
3
4
5
6
7
8
9
static
  {
    try
    {
      DriverManager.registerDriver(new Driver());
    } catch (SQLException E) {
      throw new RuntimeException("Can't register driver!");
    }
  }

This is a great example where we are making our code loosely-coupled with the use of reflection API. So basically we are doing following things using Class.forName() method call.

1
2
Driver driver = new OracleDriver();
DriverManager.registerDriver(driver);

DriverManager.getConnection() method uses the registered JDBC drivers to create the database connection and it throws java.sql.SQLException if there is any problem in getting the database connection.

Now let’s write a simple test program to use the database connection and run simple query.

JDBC Statement and ResultSet

Here is a simple program where we are using the JDBC Connection to execute SQL query against the database and then processing the result set.

DBConnectionTest.java
1
2
3
4
5
6
7
8
9
10
11
12
13
14
15
16
17
18
19
20
21
22
23
24
25
26
27
28
29
30
31
32
33
package com.journaldev.jdbc;
import java.sql.Connection;
import java.sql.ResultSet;
import java.sql.SQLException;
import java.sql.Statement;
public class DBConnectionTest {
    
    private static final String QUERY = "select id,name,email,country,password from Users";
    public static void main(String[] args) {
                
        //using try-with-resources to avoid closing resources (boiler plate code)
        try(Connection con = DBConnection.getConnection();
                Statement stmt = con.createStatement();
                ResultSet rs = stmt.executeQuery(QUERY)) { 
            
            while(rs.next()){
                int id = rs.getInt("id");
                String name = rs.getString("name");
                String email = rs.getString("email");
                String country = rs.getString("country");
                String password = rs.getString("password");
                System.out.println(id + "," +name+ "," +email+ "," +country+ "," +password);
            }
        } catch (SQLException e) {
            e.printStackTrace();
        }
        
    }
}

Notice that we are using Java 7 try-with-resources feature to make sure that resources are closed as soon as we are out of try-catch block. JDBC Connection, Statement and ResultSet are expensive resources and we should close them as soon as we are finished using them.

Connection.createStatement() is used to create the Statement object and then executeQuery() method is used to run the query and get the result set object.

First call to ResultSet next() method call moves the cursor to the first row and subsequent calls moves the cursor to next rows in the result set. If there are no more rows then it returns false and come out of the while loop. We are using result set getXXX() method to get the columns value and then writing them to the console.

When we run above test program, we get following output.

1
2
3
1,Pankaj,pankaj@apple.com,India,pankaj123
4,David,david@gmail.com,USA,david123
5,Raman,raman@google.com,UK,raman123

Just uncomment the MySQL database configuration properties from db.properties file and comment the Oracle database configuration details to switch to MySQL database. Since the data is same in both Oracle and MySQL database Users table, you will get the same output.

Download JDBC example Project:

http://www.journaldev.com/?wpdmact=process&did=MjYuaG90bGluaw==

Facebook Launches M, Your New Personal Digital Assistant

We have been reading reports about Facebook’s rumored digital assistant codenamed Moneypenny. But, today we’ve got more details about Facebook’s new service that challenges Apple, Microsoft and Google’s personal assistants. In a Facebook post, Facebook Messenger head David Marcus introduced the new service called M:

“Today we’re beginning to test a new service called M. M is a personal digital assistant inside of Messenger that completes tasks and finds information on your behalf. It’s powered by artificial intelligence that’s trained and supervised by people.”

Facebook says that M is very different from the other digital assistance services in the market as it actually completes the services on your behalf. With M, you can buy items, get your gifts delivered, book hotels and restaurants, check appointments and flights and a lot more.

facebook-m-header-780

Marcus adds: “This is early in the journey to build M into an at-scale service. But it’s an exciting step towards enabling people on Messenger to get things done across a variety of things, so they can get more time to focus on what’s important in their lives.”

Now, Facebook is ready to challenge Google’s Google Now, Microsoft’s Cortana and Apple’s Siri. Using your massive amount of data, Facebook is expected to push you services in a more personalized manner.

This rollout is slow and a few hundred users will be seeing M in their Messenger for the time being. Stay tuned for more updates.

how to boot Kali Linux 2.0 in USB and Install it

In this tutorial we will teach you how to boot Kali Linux 2.0 in USB and Install it.

Step 1: Download and install Universal USB Installer

Step 2: Select “Kali Linux” and click “Browse” and select the iso of Kali Linux.

Step 3: Select your USB Flash Drive and Click “Create” and wait for few minutes. When you receive a message Installation is done, Process is Complete! click Close and eject your pen drive.

Rest of the steps are in the video. Sorry for bad video quality.

Note: If you come across an error saying “could not detect and mount CD-Rom”, then just remove the pen drive and insert it again. It should work.

16-year-old Indian-Origin Kid Claims His Search Engine Is 47% More Accurate Than Google

search-engine-better-than-google-indian-kid

Google is hands down the big daddy of search engines and twines in itself the definition of world wide web. Google has been challenged time and again in its search supremacy, most recently rumored by Apple Inc. Competition is always expected in the tech industry, but Google’s search algorithm getting challenged by a 16-year-old Indian origin kid is unprecedented.

Anmol Tukrel is like any other regular teenager who had just passed his tenth grade, except that he is now challenging Google’s authority. In a matter of few months and approximately 60 hours of coding, Anmol, who is an Indian origin Canadian citizen, has designed a personalized search engine claiming it to be 47% more accurate than the Google Search, and about 21% more accurate on an average.

While talking to The Times of India Anmol said:

“I thought I would do something in the personalized search space. It was the most genius thing ever. But when I realized Google already does it, I tried taking it to the next level

Anmol started the project of personalized search engine as part of submission into Google Science Fair, a global online competition open to students age 13 to 18 years.”

The accuracy of the search engine was tested to a limited search query of this year’s news articles from The New York Times. He compared the search results of his indigenous search engine with that of Google and the accuracy accordingly was well, above 47%. For all the skeptics, Anmol has put up a link to the test cases online for anyone to view.

The kid had a very basic developmental kit, a computer with at least 1 gigabyte of free storage space, a python-language development environment, a spreadsheet program and access to Google and New York Times.

Google has just announced Sundar Pichai, an Indian as its CEO, and now an Indian origin teen challenging the tech giant who had recently rebranded itself to Alphabet. Seems like the Silicon Valley has a mysterious affinity to the Indians.

Here Are The 5 Best Features of Android Marshmallow

It’s been less than a week since the restructuring of Google under Alphabet, but it seems as if the tech giant is already on a roll. Android maker has announced that the next iteration of Android will be called Android Marshmallow. Google has already released the second developer preview version of Android Marshmallow, its upcoming mobile operating system release.

While the name is one issue, we bring to you some of the new features and enhancements Android Marshmallow update is bringing about after its predecessor, Android Lollipop:

Best Features of Android Marshmallow | App Permissions:

If you are not fond of giving excess information to the apps like your images, location etc., then this feature is meant for you. Using this, you can disable such functions in the apps permission lists provided in Android Marshmallow.

android-m-pictures-2

Best Features of Android Marshmallow | Memory tracker:

In case you want to track which app is consuming the largest amount of memory, you can simply track it using the latest feature in Android Marshmallow.

android-m-pictures-2

Best Features of Android Marshmallow | Fingerprint access:

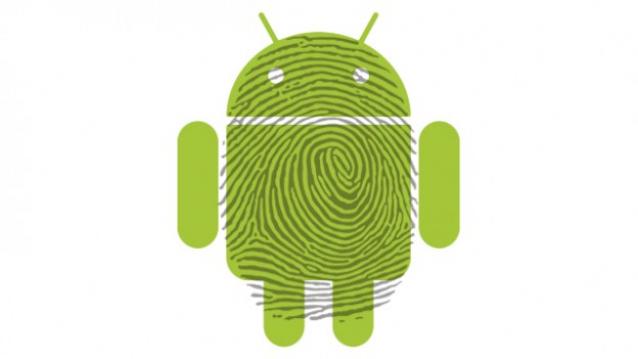
This feature of Android Marshmallow will not only help you in logging into a system using your fingerprints but also to log into platforms such as Google play store and you can also authorize your purchases at Play Store.

Android_640-624x351

Best Features of Android Marshmallow | Auto Backup:

Now, you don’t have to worry about losing your data anymore, as Android Marshmallow comes with an inbuilt auto backup feature that stores your data on Google drive up to 25 MB per app.

android-m

Best Features of Android Marshmallow | Power Saving:

Android Marshmallow comes with a feature that lets you save on energy consumption upon recognizing that the phone has not been used for a long time. The Doze mode will reduce the background processes and ensure minimal battery usage.

Take a look at this infographic by Samsung about the best features of Android Marshmallow:

androidm-infographic

For the final Android Marshmallow experience, we’ll have to wait till October-November i.e. by the time of the actual release of the operating system. Meanwhile, we guess what else Google’s new CEO has in his store for the Android users.

If you are not fond of giving excess information to the apps like your images, location etc., then this feature is meant for you. Using this, you can disable such functions in the apps permission lists provided in Android Marshmallow.

How To Make 3D Hologram At Home By the Easiest Method

Smartphone_3D_hologram

You won’t call any concept a science fiction unless its characters are flying through space-time, or have phenomenal powers. Your brain also plays with the idea of some futuristic technology and importantly long distance call that include holograms.

While other stuff would be difficult to own, but you can definitely make 3D hologram out of two-dimensional videos now. Holograms are the part of the new technological era and occupy technical enthusiast’s mind. On one hand, we have the Microsoft HoloLens, and on other we have GHOST that literally sucks out data from your screen and converts into a 3D hologram.

But, now to make a 3D hologram, you don’t need to buy any expensive gadget. Just a few stationary items and a clean transparent glass or plastic sheet will do. You will require:

Graph Paper: To get precise measurements
Plastic/Glass Sheet (Transparent): Main Apparatus
Tape
Pen
Knife/Glass Cutter
Smartphone/Tablet

Once you have collected all these things, you are just 15 minutes away to make a 3D hologram at your home.

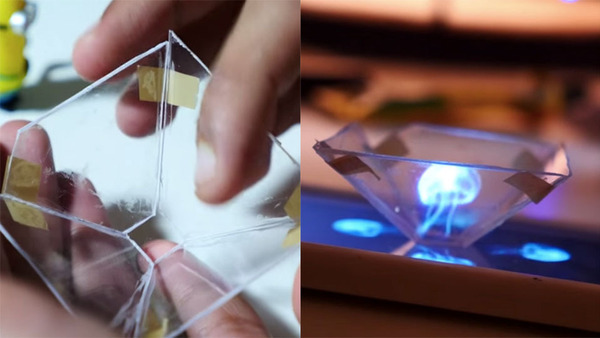
Cut the sheet precisely into 4 congruent trapeziums and join them with a transparent tape to create a simple pyramidal frustum. Your set-up is ready. Now, all you need are some hologram specific videos that you will easily get from the YouTube.

So, just place your pyramidal frustum set-up on your smartphone screen and let the physics do the rest as it makes 3-D hologram for you.

You can check out this YouTube video for reference:

Windows 10: Most Important Features You Need to Know

Short Bytes : With Windows 10, Microsoft is making a strong step towards its goal of One Microsoft by looking forward to connect all the Windows devices more effortlessly. Now, Windows 10 is released and we are going to tell you the best features of Windows 10.

windows-10-feature

windows 10 was the major feature of the event. Let’s take a look at the most important Windows 10 features and related to Microsoft’s OS:

Return of the Start Menu:

Ussssntitled

Microsoft tried hard to make a single operating system for desktop PCs and touch devices with Windows 8, but the absence of the classic start menu wasn’t welcomed. With Windows 10, Microsoft has brought the start menu back. The start menu has undergone drastic visual change and it expands to a full-screen view.

As I’ve written in earlier posts, Microsoft has designed a special feature calledContinuum for the convertible devices. There is an action center which provides fast access to settings like Wi-Fi, Bluetooth etc.

Cortana meets PC:

spartan-web-browser-cortana-microsoft

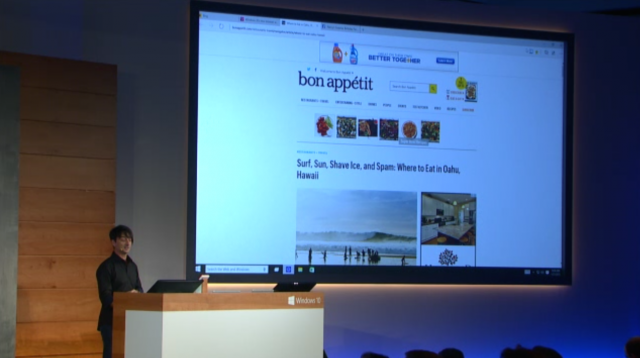
Microsoft has brought the power of voice search assistance to the Desktop.Cortana has got her own place very next to the start button on the taskbar and can perform basic tricks as seen in Windows Phone.

Cortana can be used via voice queries or text. At the event, Microsoft showed off some handy commands like “Play my music” to launch the music app and “Please be quiet” to silence the music. Microsoft’s Joe Belfiore showed off the power of Cortana by asking few more questions and it worked pretty well.

Edge Browser is a reality:

Screen-Shot-2015-01-21-at-1.05.12-PM-640x358

Brand-new Microsoft Edge has arrived on PCs along with Windows 10. Microsoft has brought a cleaner and more powerful web-browser with new features in Windows 10.

As I’ve written in earlier posts, Edge has some of the most advanced features ever for a web browser. These features include web-page annotation, brand new way to group tabs together etc.

Cloud is more prominent with OneDrive:

Microsoft wants to make OneDrive a larger contributor when it comes to Windows 10. It will be used for syncing data like music and photos.

Must Read: Our complete Windows 10 coverage.

Xbox meets PC:

2786759-windows10xboxone

Microsoft has decided to launch the Xbox app for each kind of device running on Windows 10. Microsoft has a prominent presence in the gaming market and it is looking forward to make PC gaming Network Windows Live more playable.

With Xbox app, users will be able to stream games from Xbox One on PC and this is definitely an exciting addition.

Windows 10 for phones:

Windows_10_phone_start

Unifying the devices of all shapes and sizes, Microsoft’s Windows 10 will come for phones too. There is a special version of the OS which made of the devices smaller than 8 inches. The notifications and information will be syncing in real-time between the desktop and mobile device.

Universal apps:

Microsoft announced that universal apps will be coming to the Windows ecosystem.

With Windows RunTime coming to Windows Phone 8.1, developers can now write the app using a common code and it’ll work across phones, tablets, PCs and even the Xbox One.

With the universal apps, Windows 10 can fulfill the dearth of apps because mobile and desktops will be able to support each other.

Microsoft has made some bold and risky moves in the announcement and is trying to leave the failures of Windows 8 and Windows Phone behind. It showed believe in cloud and the goal to achieve a unified operating system for all devices. To ensure its success, Microsoft will have to show the customers the superiority of Windows 10 over Windows 8.

Archaeologists Uncover Something Shocking Underneath The Easter Island Heads. This Is So Cool!

I’ve always considered the head statues on Easter Island to be a great wonder of the world; however, I’ve never actually thought to learn more about them. In fact, I’ve been referring to them as “the head statues” my entire life, but they are actually called Moai! The Moai were carved by the Rapa Nui people between 1250 – 1500 CE. Up until now, it was believed that, although impressive in stature, the Moai were nothing more than just heads. However, it was recently discovered that there’s more than meets the eye with these head statues. They’re actually attached to bodies that are buried deep underground—and they’re covered in indecipherable writings called petroglyphs.The significance of these statues has always been somewhat of a mystery—it’s exciting to think that these petroglyphs could be the key to unlocking the meaning of these massive Moai!

Easter Island

Easter Island covers about 64 square miles in the South Pacific Ocean, 2,300 miles from Chile. The island is home to nearly 900 giantstone statues that date back several centuries.

AD-Easter-Island-Statue-Bodies-1A

First Human Inhabitants

The Rapa Nui are believed to have emigrated to the island around 300-400 A.D. It is held that the first king of Rapa Nui was Hoto-Matua, whose ship landed at Aneka, one of the few sandy beaches on the island’s rock-infested coast.

AD-Easter-Island-Statue-Bodies-2

The Statues

The statues stand at an average height of 13 feet and weigh roughly 13 tons. To this day, no one knows why they were constructed or how they were moved around the island

AH2B07 Chili

AH2B07 Chili

The Discovery

The question of how the Rapa Nui moved the statues around became even more puzzling after scientists decided to do some digging. Literally.

AD-Easter-Island-Statue-Bodies-4AAD-Easter-Island-Statue-Bodies-5

The Underground

Hidden from view, the heads are actually attached to bodies that extend several feet below the ground.

Standing Tall

The tallest statue stands at nearly 33 feet and weighs approximately 82 tons. Another statue, found lying down, was measured at 71.93 feet in length.

AD-Easter-Island-Statue-Bodies-6

Somewhere Over the Rainbow

A few of the unearthed statues feature the same petroglyphs, referred to by researchers as the “ring and girdle” design. It is believed to represent the sun and rainbow.

AD-Easter-Island-Statue-Bodies-7

Writing on the Wall

Found on the bodies of the statues were indecipherable writings known aspetroglyphs.

AD-Easter-Island-Statue-Bodies-8

Below the Surface

They may not have bodies like this artist rendering, but knowing that they’re more than just a bunch of heads is truly awe-inspiring

AD-Easter-Island-Statue-Bodies-9

Name That Tuna

Tuna vertebrae was even found near the bottom of an excavation, backing the claim that the original carvers were rewarded for their work in meals of tuna and lobster.

AD-Easter-Island-Statue-Bodies-10

According to Wikipedia, the tallest of the 887 Moai is over 30 feet tall and weighs 82 tons. Another, if completed, would have been almost 70 feet tall and would have weighed 270 tons! Incredibly, many of these enormous statues were moved to various places around the island. The faces represent ancestors that are seen as deities.

Google Uses This Robot to Test Android Devices and Chrome OS

goole-touchbot-android

Ever thought of how Google tests the Android devices and ChromeOS for lag times? It’s pretty obvious that Google uses some kind of cutting edge technology to quantify the lag and fix it. Well, today we have the answer.

Google makes use of a robot dedicated to find the lag times between your finger input and the response of the screen. This robot is called Chrome TouchBot and is made by OptoFidelity, a company that specializes in testing automation.

Watch the video below:

Earlier we’ve seen Samsung and Apple performing bend tests on their devices but this is something more high-tech. In the video, you can see the response of the display relative to the finger-touch which is visible at a very low frame rate.

This bot performs the latency test for touch devices so that people at Google doesn’t need to test these devices manually. The Chrome TouchBot takes care of a vast range of devices and tests Android smartphones and tabs as well as the touch-sensitive Chromebook screens.

The source code of Chrome TouchBot is open source along with some latency tests to benefit everyone.